
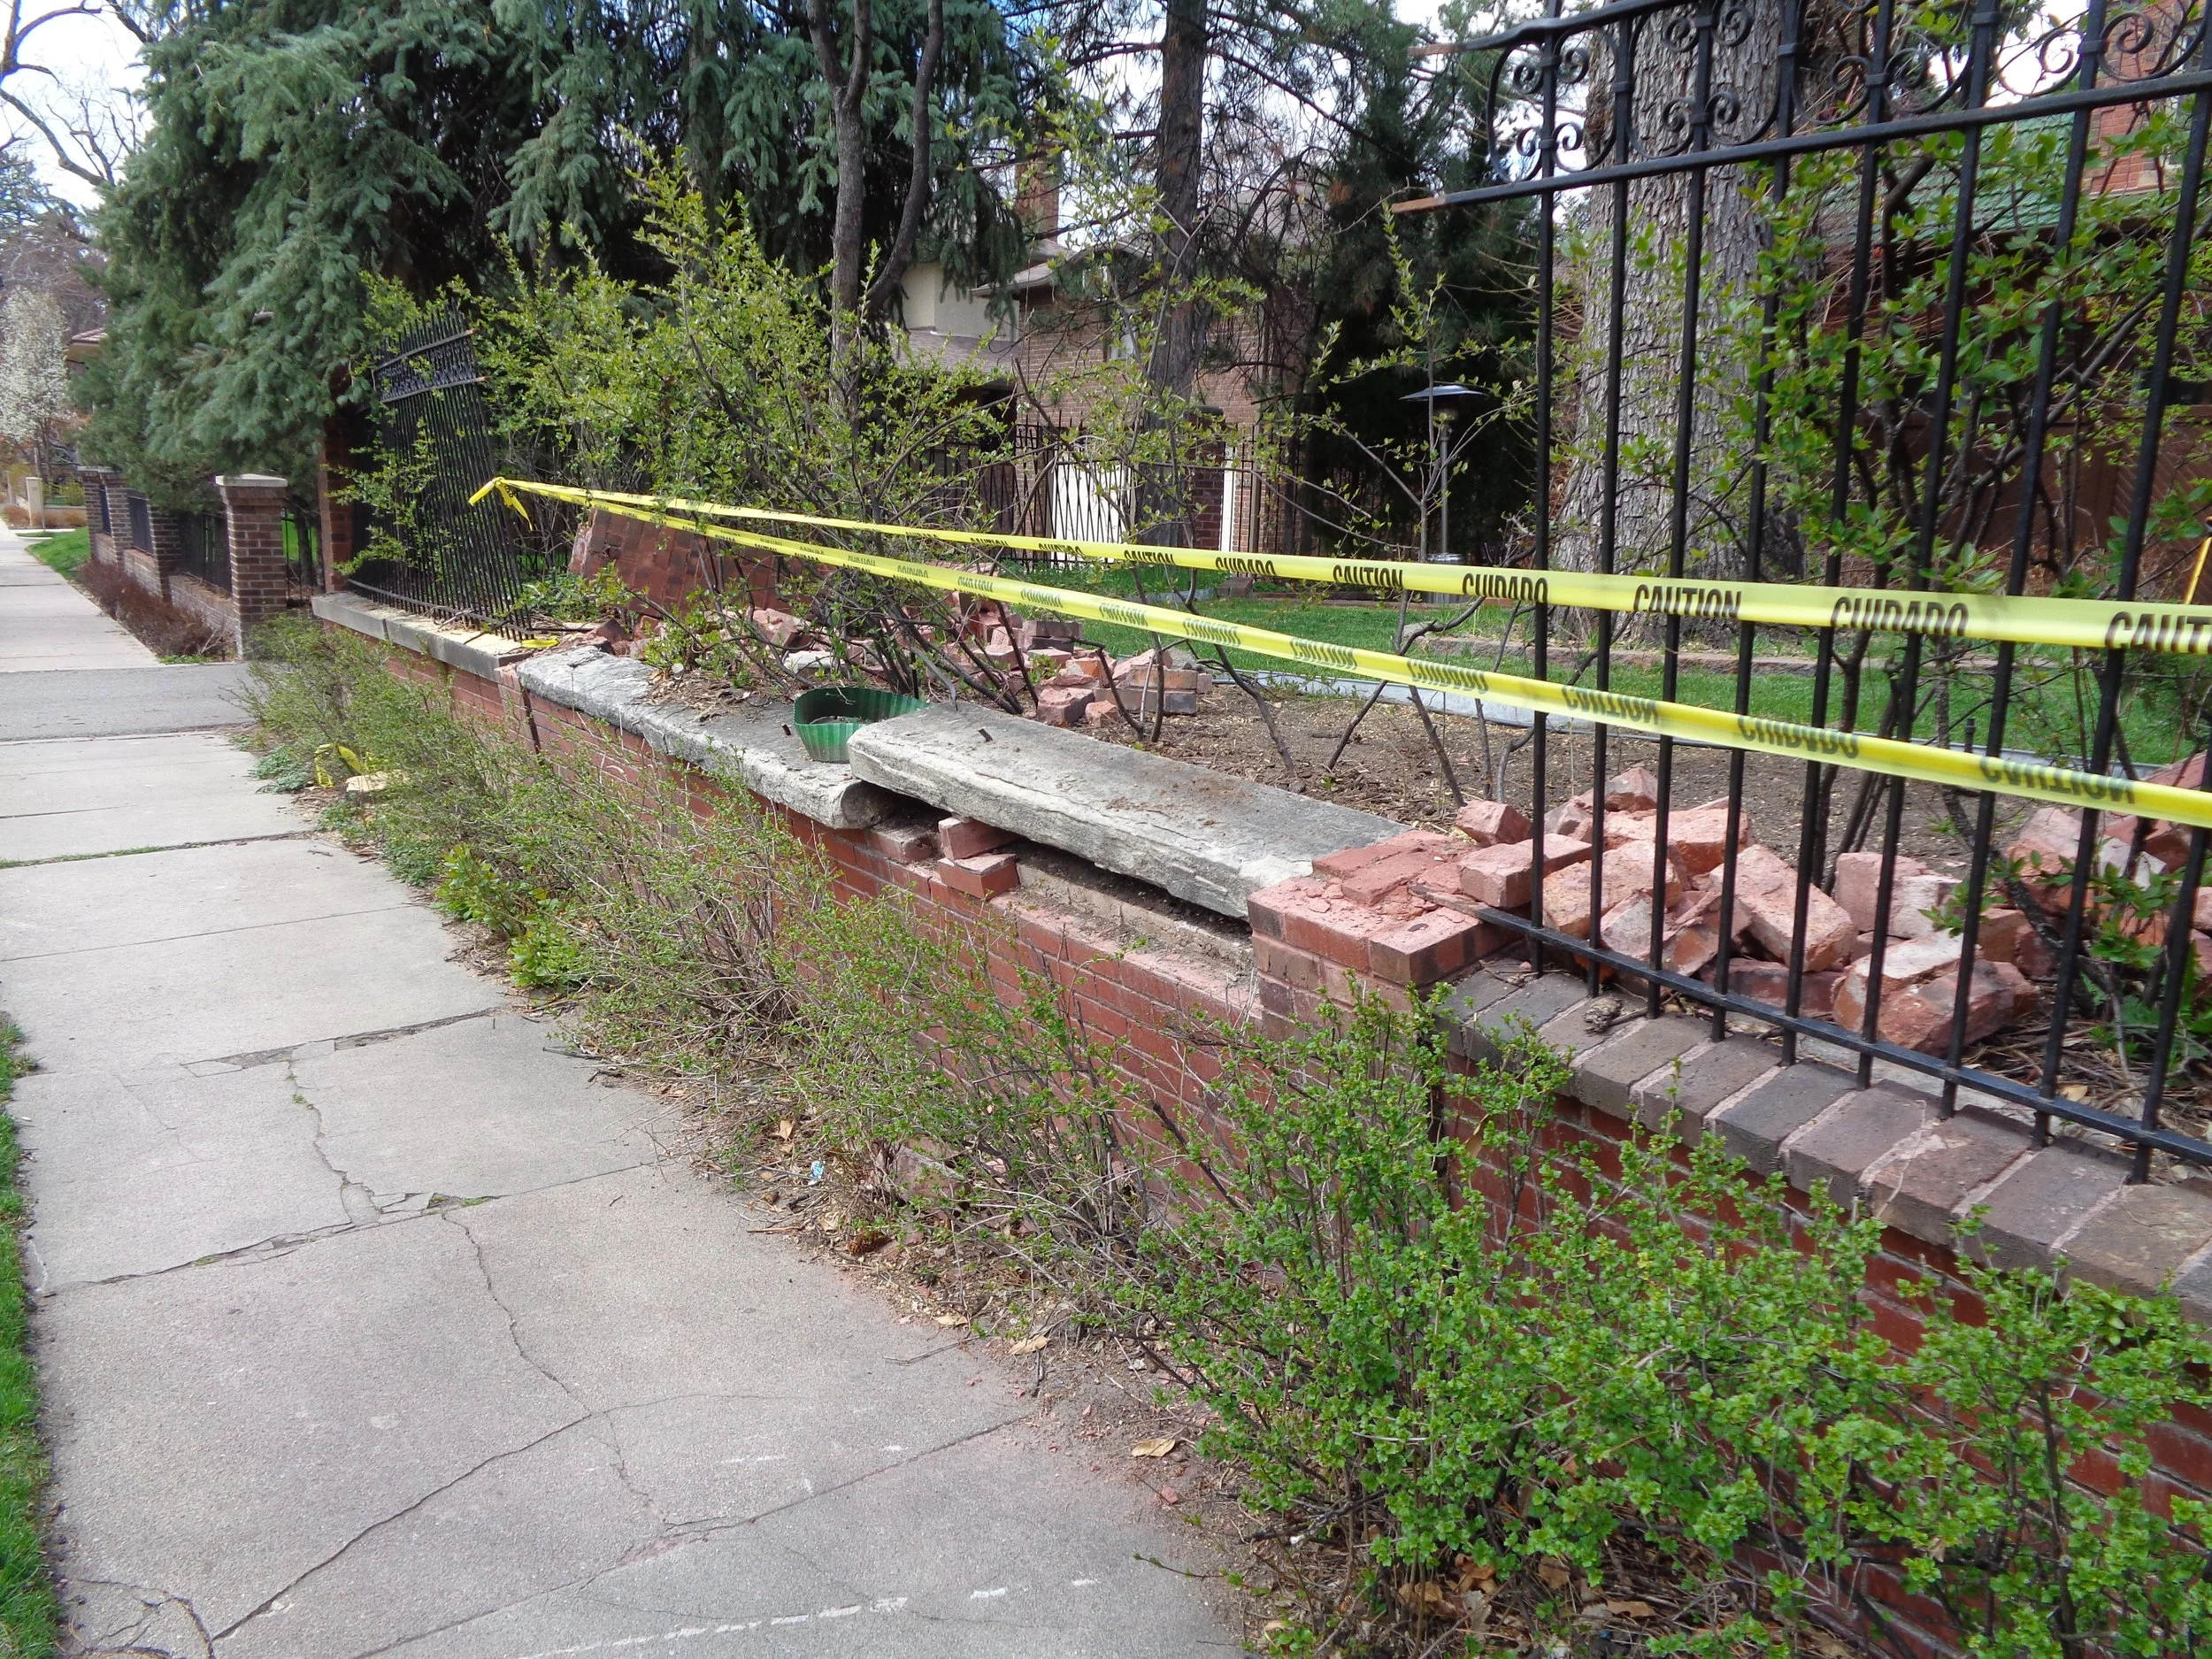
Before - Toppled Original
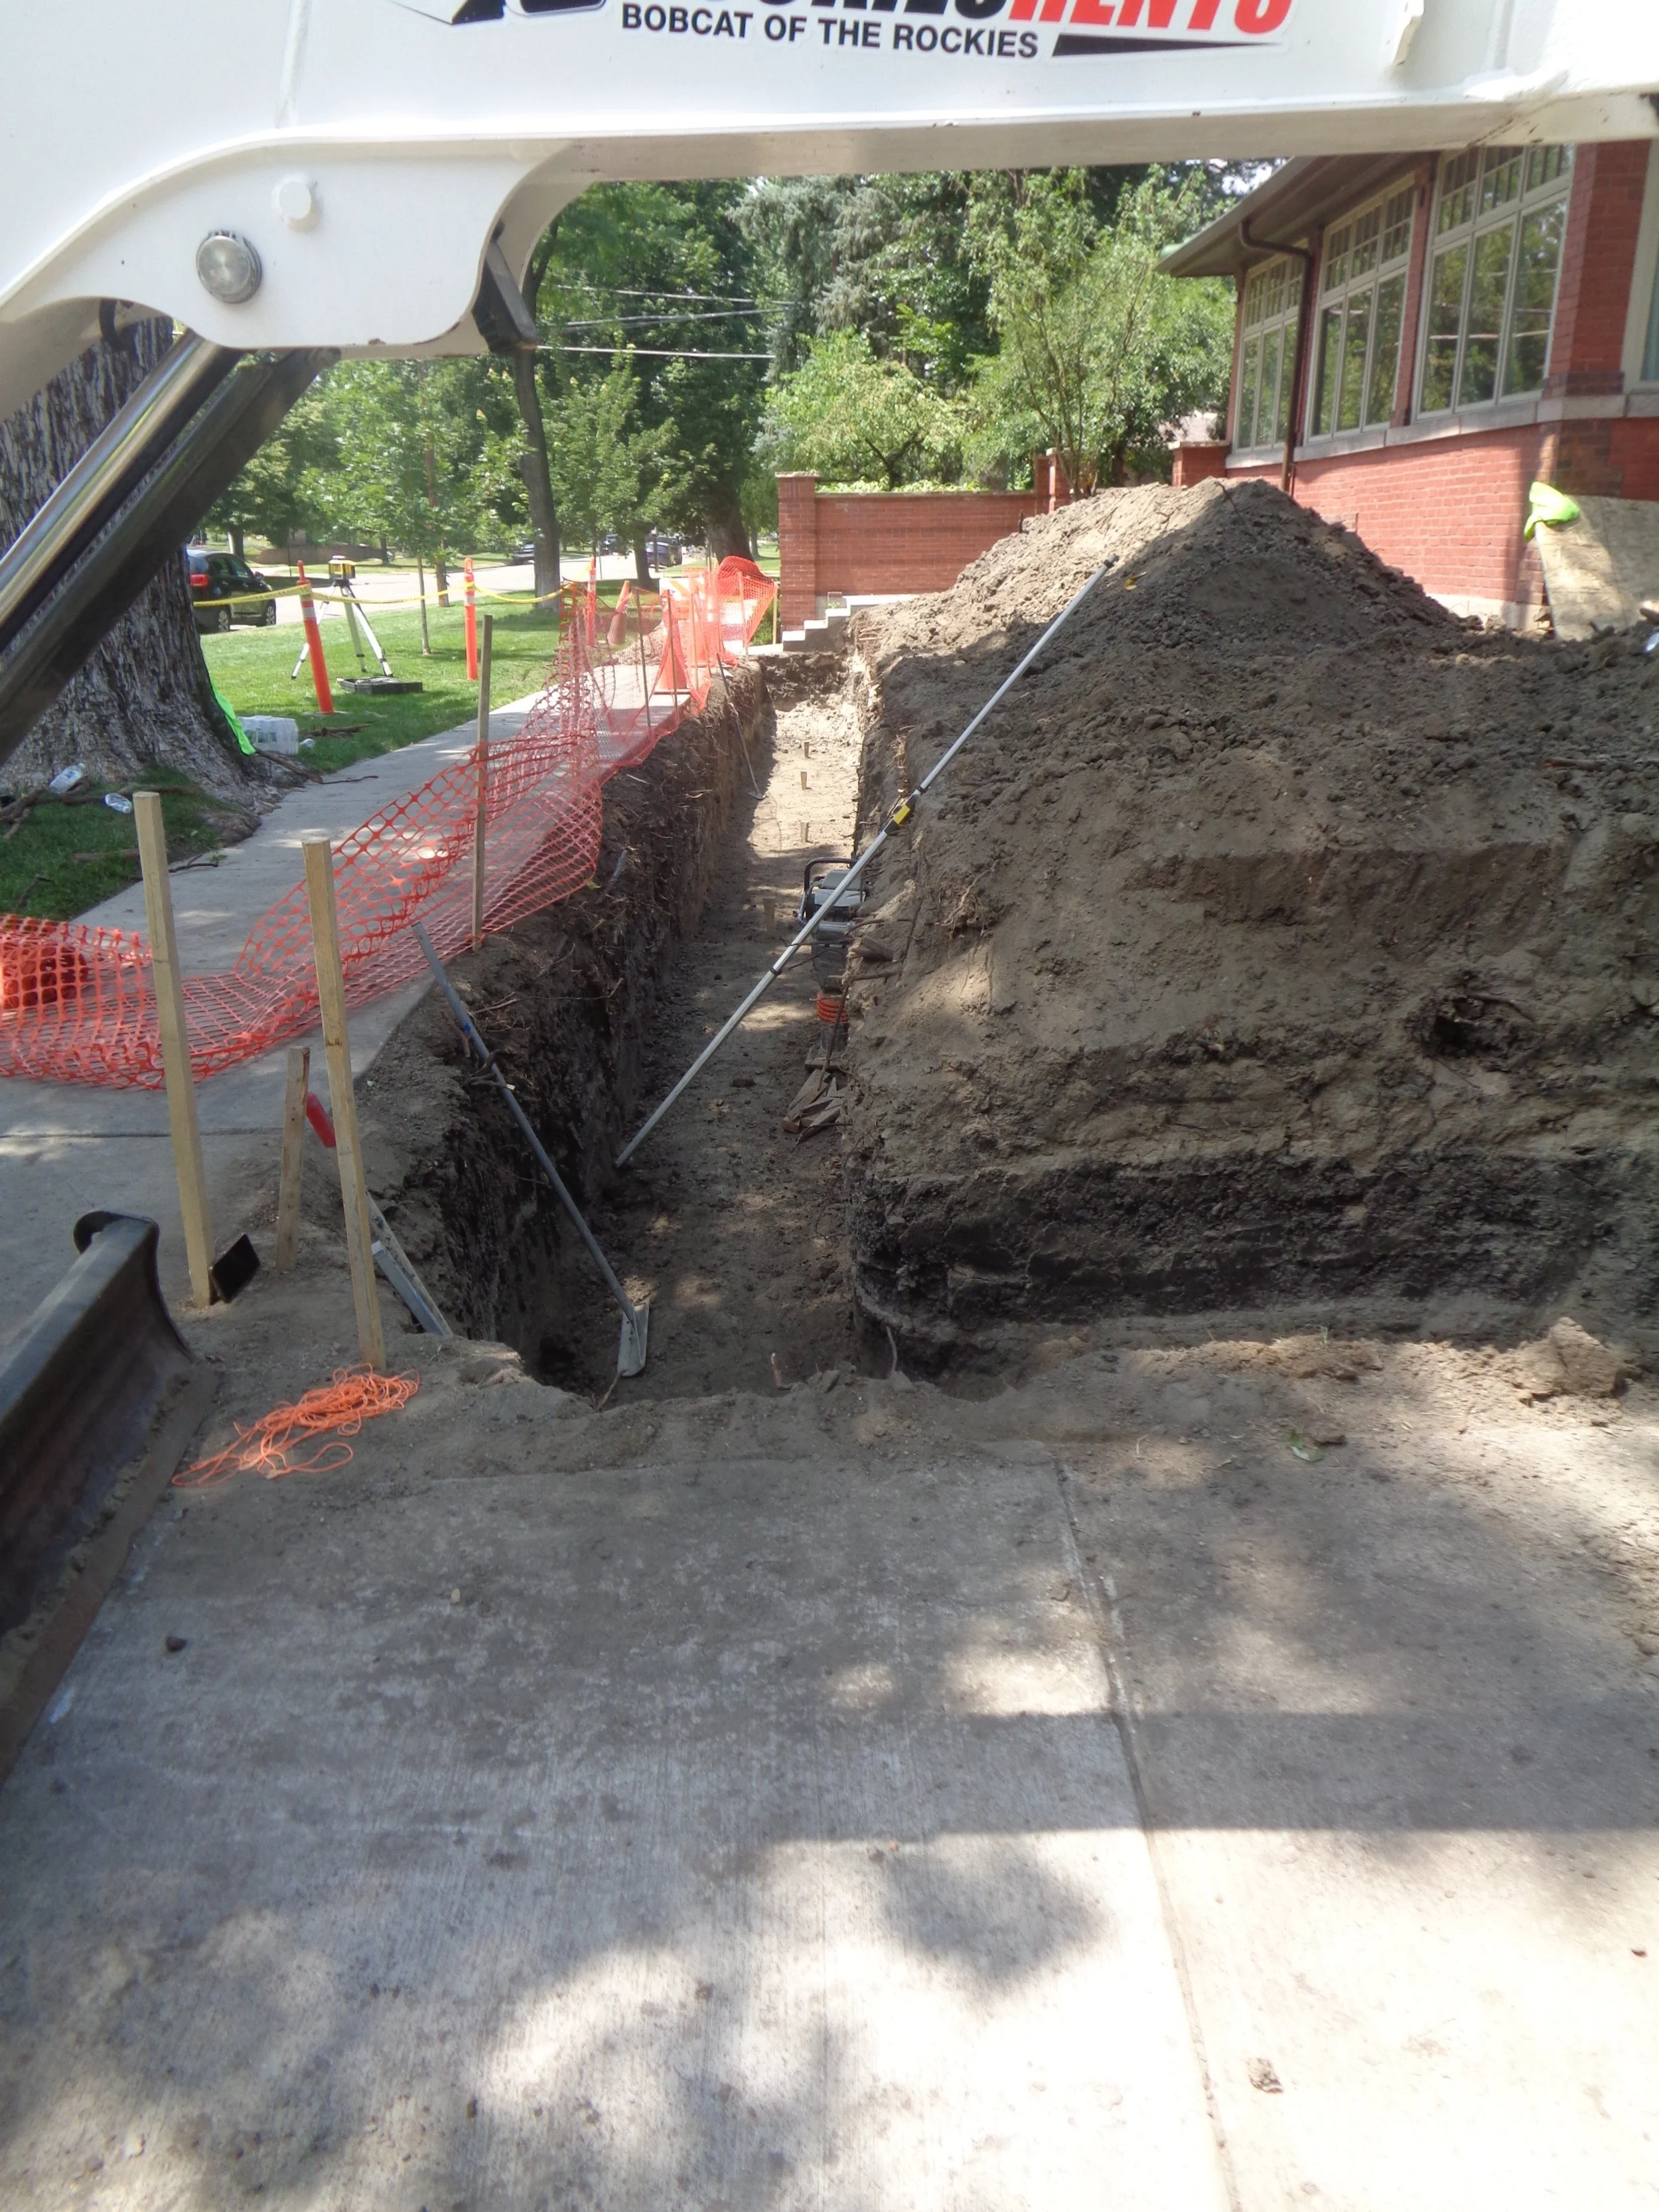
During - Required Full Excavation

After - A Good Fence the Neighborhood can be Proud Of
Poet Robert Frost once said, “Good fences make good neighbors.” He was probably thinking about wandering livestock — but in this case, the phrase applies beautifully to good design and a strong sense of place.
In Denver’s historic Country Club neighborhood, most homes are framed by elegant fences or walls that complement their architecture. The owners of this magnificent 1908 neoclassical home, designed by Frederick Sterner and George Williamson, wanted to do the same. The house itself features exquisite decorative brickwork and a stunning green glazed clay tile roof.
When a windstorm in 2012 toppled two of the original brick pillars supporting the iron fence around the backyard, the owners saw an opportunity. Instead of simply replacing what was lost, they asked if they could rebuild it as a privacy wall.
Working closely with the Denver Landmark Preservation Commission, we received approval to design a new wall inspired by a pattern from architect David Decker, known for his work at the Denver Country Club — every sixth brick course recessed by half an inch.
Fortunately, the brick used in 1908 still has a near-perfect match today: Ballpark Blend by General Shale. We tinted the mortar to match the original finish, ensuring a seamless connection between old and new.
A Return 13 Years Later
Thirteen years later, the homeowners came back with another idea: a matching retaining wall with decorative ironwork for the side and front of the home. Like many of their neighbors, they wanted a more formal edge — and they were tired of coaxing grass to grow on the sloped lawn that dropped nearly 30 inches from yard to sidewalk.
After a formal submission to the LPC, the design was approved — with one note of caution: “Don’t outshine the house.” A few thoughtful tweaks later, we had a plan that balanced elegance with restraint.
Built to Last
Every lasting wall begins with a solid foundation. For this one, that meant excavating three feet below grade for a reinforced concrete footer. Vertical and horizontal steel reinforcement tied the structure together, and once the concrete forms were stripped, masons began their precise work.
They laid the brick on cast ledges just below grade, topped with sandstone caps, while the ironworkers fabricated the custom fencing above. It might sound simple — but as the photos show, craftsmanship like this is anything but.
A Gift to the Street
To enhance the pedestrian experience, brick step lights were installed at each pillar, casting a warm downlight on the sidewalk throughout the night. Combined with post lights at the entry, the result is both beautiful and welcoming.
Neighbors have taken notice — many stop to compliment the owners as they tend their garden. It’s proof that thoughtful design not only preserves history but also enriches the everyday life of the community.